
Once you have purchased Bitcoin (BTC) from your wallet provider, you will be able to fund your account to begin trading!
Before doing so, you will need to create a request from your OspreyFX account:
-
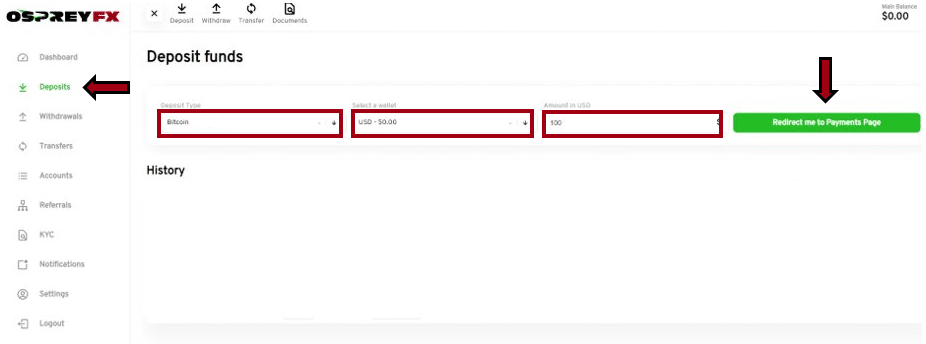
Click on the Deposit option.
-
Select a Wallet to deposit into.
*You can also deposit directly to your Trading Account without creating an internal transfer by tapping on the “platform” button under the Add Money To section.
-
Choose Bitcoin (BTC).
-
Enter the amount you want to send.
-
Click Redirect me to Payments Page.

-
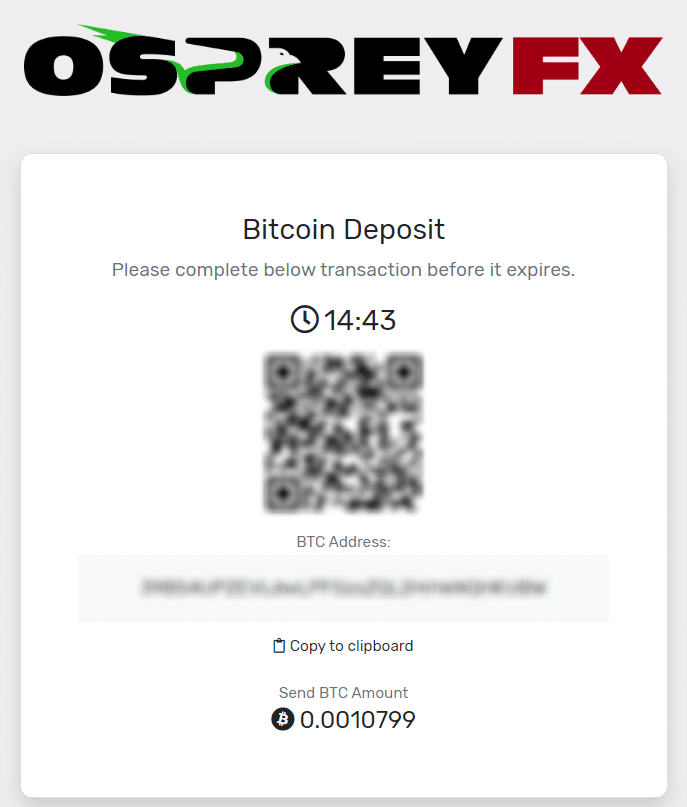
You will see an address to send your Bitcoin (BTC) to, you will have 15 minutes to submit the funds.
-
At this point, you may either copy the code manually by clicking on Copy to Clipboard or open your wallet provider’s account and Scan the QR code.

- By scanning the QR code on your wallet provider’s account, the funds will be directly sent to the Bitcoin address for processing on the Blockchain network.
- If you have copied the code manually, you will need to provide it to your wallet provider, typically using the Send or Withdraw options on your wallet provider’s account. This would differ between different wallet providers.


You will have a 30-day time frame to use the account, be able to deposit up to $2000 and start trading with us before verification is necessary.
After this period, as soon as you hit the $2000 deposit limit or before initiating any withdrawal, it is mandatory to verify your identity to remove all restrictions and fully enjoy the ability to deposit and withdraw funds without limits.
